
Are you tired of being tied down to a clunky and outdated radio automation system? Do you dream of having complete control over your station’s programming from anywhere in the world? Look no further than the ultimate Raspberry Pi radio automation solution. With its sleek design and unparalleled functionality, this system will revolutionize the way you manage your radio station. Say goodbye to the limitations of traditional automation systems and hello to a whole new level of control and customization. Read on to discover how you can dominate the airwaves with this game-changing technology.
Introduction to Radio Automation Software for Raspberry Pi
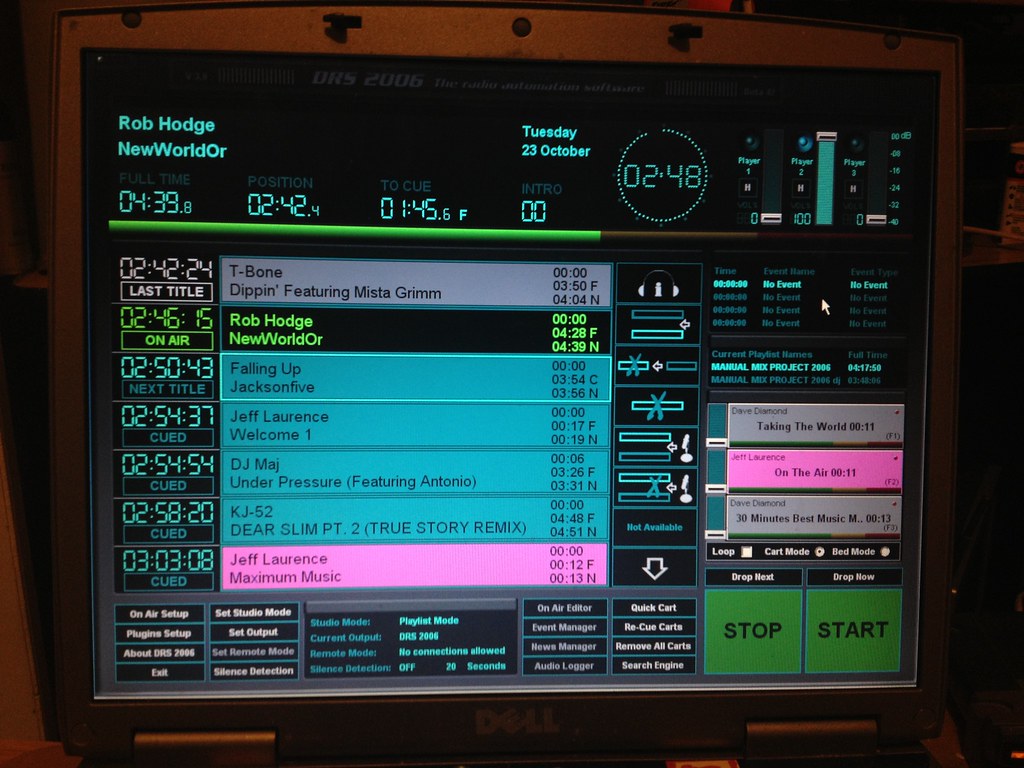
Radio automation software for Raspberry Pi is a powerful tool that can help you streamline your radio broadcasting operations. With this software, you can automate various tasks such as scheduling, playlist creation, and broadcasting. Raspberry Pi is an ideal platform for running radio automation software due to its low cost, small size, and energy efficiency.
Radio automation software can help you save time and effort by automating repetitive tasks such as scheduling and playlist creation. It also allows you to manage your broadcasts more efficiently by providing features such as remote access and monitoring. With the right radio automation software for Raspberry Pi, you can take your radio broadcasting to the next level and dominate the airwaves with ease.

Setting Up Your Raspberry Pi for Radio Automation
Before you can start using radio automation software for Raspberry Pi, you’ll need to properly set up your device. Start by downloading and installing Raspbian, which is a Linux-based operating system specifically designed for the Raspberry Pi. Once installed, make sure your system is updated and upgraded by running the necessary commands in the terminal.
Next, connect hardware components such as speakers, headphones, or a USB sound card to ensure proper audio output. You may also want to consider adding an external hard drive or USB stick as storage space for music files.
Additionally, it’s important to configure your network settings so that your Raspberry Pi can connect to the internet and access online radio stations or stream playlists from other devices on your network.
Properly setting up your Raspberry Pi will ensure seamless integration with any chosen radio automation software and allow you to fully utilize all its features.
Choosing the Right Radio Automation Software for Your Needs
When it comes to choosing the right radio automation software for your Raspberry Pi, there are a few factors to consider. Firstly, think about what features you need – do you want something simple that just plays music, or a more complex solution with scheduling and playlist management? Secondly, consider compatibility – make sure the software is compatible with both your version of Raspberry Pi and any additional hardware you may be using. Finally, think about user-friendliness – choose software with an intuitive interface that does not require extensive technical knowledge to operate. Some popular options include DarkIce for live streaming and Liquidsoap for automation. Ultimately, take some time to research different options and read reviews from other users before making your decision on which radio automation software to go with.
How to Install and Configure Radio Automation Software on Raspberry Pi
Setting Up Raspberry Pi for Radio Automation Software
To set up your Raspberry Pi for radio automation software, you will need to ensure that it is properly configured and connected to the internet. First, make sure that you have installed the latest version of the Raspberry Pi operating system. Once this is done, enable SSH access on your device so that you can remotely connect to it from another computer. Additionally, connect your Raspberry Pi to a compatible USB sound card or audio interface in order to enable audio output capabilities. Finally, install any necessary dependencies and packages required by your chosen radio automation software program before proceeding with the installation and configuration process. With these basic steps completed, you’ll be well on your way towards building a powerful and customizable radio broadcasting solution using your Raspberry Pi!
Installing and Configuring Your Radio Automation Software on Raspberry Pi
To get started with installing and configuring your radio automation software on Raspberry Pi, first download the appropriate package for your system. Then, follow the installation instructions provided by the software provider. Once installed, access the configuration settings to input relevant information such as station name, stream URL, and playlist directories. Take advantage of automation features such as crossfading and scheduled transitions to enhance the listening experience for your audience. It is also important to ensure that all necessary plugins or add-ons are installed and activated for optimal performance. Test your setup thoroughly before launching it live to ensure smooth operation.
Keywords: radio automation software, automation features
Customizing Your Radio Station with Raspberry Pi Automation Software Features
Whether you are looking to add jingles, sound effects, or custom voiceovers to your broadcasts, radio automation software for Raspberry Pi has got you covered. With easy-to-use plugins and add-ons, you can customize your radio station’s sound without any hassle. Simply browse through the available options and choose the ones that fit your needs.
To further enhance your broadcasting capabilities, some radio automation solutions also offer advanced features such as remote access and integration with social media platforms. With these features at hand, you can manage playlists from anywhere in the world and expand your reach beyond traditional listening channels.
By taking advantage of all the powerful customization tools available in a reliable radio automation software for Raspberry Pi, you can create a unique broadcasting experience that engages listeners like never before.
Troubleshooting Common Issues During Installation of Radio Automation Software on Raspberry Pi
During the installation of radio automation software on Raspberry Pi, there may be some common issues that you could encounter. One of the most common issues is the compatibility of the software with your Raspberry Pi’s operating system. Make sure to choose a software that is compatible with your Raspberry Pi’s OS version. Another issue is incorrect installation or configuration of dependencies. Ensure that all dependencies are installed and configured correctly before installing the radio automation software. If you encounter any issues during installation, check the software’s documentation or online forums for troubleshooting tips and solutions.
Customizing Your Radio Automation Solution with Plugins and Add-Ons
One of the best things about using radio automation software for Raspberry Pi is the ability to customize it with plugins and add-ons. These can enhance your radio broadcasting experience and provide additional features that may not be available in the base software.
Some popular plugins for radio automation software include audio processing plugins that can improve the sound quality of your broadcasts, and metadata plugins that can automatically add song information to your playlists.
Other add-ons may include support for different audio formats, integration with third-party services like Spotify or SoundCloud, or even custom scripts that allow you to automate specific tasks.
When choosing plugins and add-ons, it’s important to consider compatibility with your chosen radio automation software and ensure they are from reputable sources. With the right customization options, you can create a truly unique and powerful radio automation solution with Raspberry Pi.
Creating and Managing Playlists with Raspberry Pi Radio Automation Software
Creating and Managing Playlists is a crucial aspect of radio automation. Once you have your music library organized, it’s time to start building playlists that will be played on air. With Raspberry Pi radio automation software, creating playlists is easy and flexible. You can create custom playlists for different shows or time slots, or even create smart playlists that automatically fill themselves with tracks based on specific criteria such as song length or genre.
Managing your playlists can also be done with ease using the software’s intuitive interface. You can add or remove songs from existing lists with just a few clicks of the mouse, reorder tracks as needed, and preview how each playlist will sound before scheduling it to play live.
Customization options are often available too; some programs allow you to set fade-in/fade-out timing between songs and adjust volume levels during transitions for a more professional sounding broadcast. Overall playlist creation and management are key features that make Raspberry Pi Radio Automation Software an essential tool for anyone serious about broadcasting their own show!
Scheduling and Automating Your Radio Broadcasts with Raspberry Pi
Setting up Your Raspberry Pi Radio Automation System
To effectively schedule and automate your radio broadcasts with Raspberry Pi, you first need to set up your system properly. Radio automation software must be installed on the Raspberry Pi device, along with any necessary plugins or add-ons for customization. It’s important to ensure that your Raspberry Pi is connected to the internet and has reliable power before scheduling automated broadcasts. Once your system is set up, you can use the radio automation software’s built-in scheduler to automatically play pre-made playlists at specific times throughout the day. With proper setup and scheduling, Raspberry Pi can provide a cost-effective and efficient solution for broadcasting content over traditional airwaves or online streaming platforms.
Scheduling Your Radio Broadcasts with the Ultimate Raspberry Pi Solution
With radio automation software for Raspberry Pi, scheduling and automating your broadcasts is a breeze. You can set up playlists to play at specific times, or even have different programs scheduled every day of the week. The scheduler feature allows you to automate your broadcasts so you don’t have to be constantly monitoring them.
Using cron jobs, you can also schedule backups of your music database or configuration files in case anything goes wrong. With the right setup, your Raspberry Pi can become a fully automated radio station that runs 24/7 without any intervention needed.
Overall, scheduling and automating with radio automation software for Raspberry Pi helps streamline processes and ensures consistency in broadcasting while allowing you more time to focus on other important aspects of running a successful radio station.
Automating Your Radio Programs to Maximize Efficiency and Reach
One of the key benefits of using radio automation software for Raspberry Pi is the ability to automate your radio programs. This means that you can schedule your broadcasts in advance, ensuring that your listeners always have fresh content to tune into. By automating your radio programs, you can maximize efficiency and free up time to focus on other aspects of your radio station.
To get started with automating your radio programs, simply create a playlist of pre-recorded content or use the software’s built-in scheduling feature to automatically play certain tracks or shows at specific times. You can also use plugins and add-ons to further customize your automation settings and ensure that your broadcasts are reaching the widest possible audience. With the right setup, you can take your radio station to new heights of success and reach a global audience with ease.
Troubleshooting Common Issues When Using Raspberry Pi for your Radio Automation Needs
When using Raspberry Pi for your radio automation needs, it’s important to be aware of common issues that may arise. One common issue is the system freezing or crashing due to high CPU usage. To prevent this, make sure to close any unnecessary programs and limit the number of plugins and add-ons running at once. Another issue is audio distortion or poor sound quality, which can be caused by inadequate power supply or incorrect audio settings. To troubleshoot this, ensure that your power supply meets the recommended specifications and adjust audio settings as needed. By being aware of these common issues and taking steps to prevent and troubleshoot them, you can ensure a smooth and successful radio automation experience with Raspberry Pi.
Tips and Tricks for Optimizing Your Raspberry Pi Radio Automation Solution
One of the keys to optimizing your Raspberry Pi radio automation solution is regular maintenance. Keep an eye on your system’s performance, and perform any necessary updates or maintenance tasks as needed. Another important aspect of optimization is proper hardware selection. Be sure to select a high-quality USB sound card and other components that are well-suited for running radio automation software on a Raspberry Pi.
Another helpful tip is customizing your user interface, using plugins and add-ons to create a more streamlined, personalized experience. Consider utilizing features like drag-and-drop playlist creation or advanced scheduling options to improve efficiency.
Finally, consider integrating social media into your broadcasting strategy by adding live tweeting or Facebook integration through plugins. This will help you reach a wider audience and engage with listeners in new ways!
Troubleshooting Common Issues with Raspberry Pi Radio Automation Software
While Raspberry Pi radio automation software is a powerful tool, it can sometimes encounter issues that need troubleshooting. One common issue is the software crashing or freezing. This can be caused by insufficient memory or an outdated version of the software. To fix this, ensure that your Raspberry Pi has enough memory and update the software to the latest version.
Another issue is audio quality. If you notice poor audio quality, check your audio settings and ensure that your equipment is properly connected. You may also need to adjust the bit rate or sample rate in your software settings.
If you experience issues with scheduling or playlists not playing correctly, double-check your settings and make sure that they are configured correctly. You may also need to restart the software or reboot your Raspberry Pi.
By troubleshooting these common issues, you can ensure that your Raspberry Pi radio automation solution runs smoothly and efficiently.
In conclusion, the Raspberry Pi radio automation software is a powerful tool that can help streamline your radio broadcasting. By setting up and customizing your system with the right software and add-ons, you can create and manage playlists, schedule broadcasts, and automate routine tasks. With its flexibility and ease-of-use, you’ll be able to revolutionize your approach to radio broadcasting. So why wait? Get started today and dominate the airwaves with your ultimate Raspberry Pi radio automation solution!